You have full control over what shows in your menus with WordPress.
Contents
Most of our themes have at least a header menu. Some have a footer menu as well. You can manage your menu links in Appearance > Menus (or in the Customizer).

Setting Locations
Themes have “locations” that menus can be placed into. Go to Appearance > Menus then click the Manage Locations tab at the top to view the theme’s menu locations. A menu must be assigned to a location in order for it to appear there. Select the correct menu for each location or click Use new menu if no menu has been created yet.
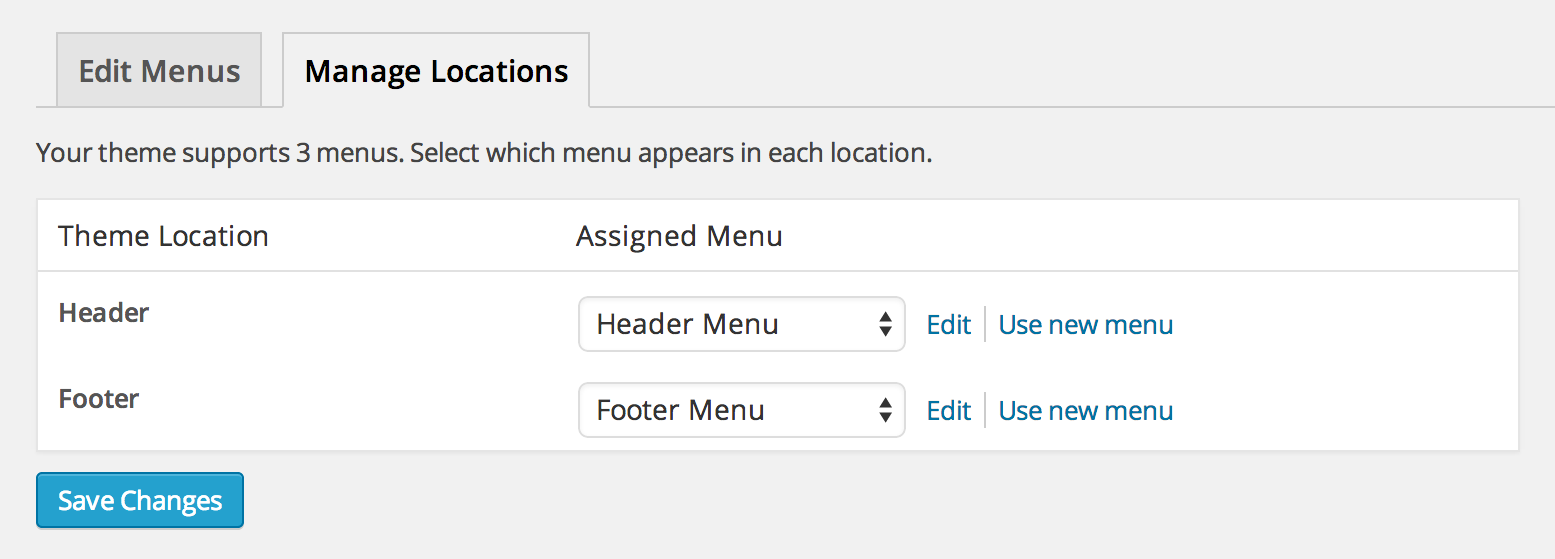
If you imported Starter Content, menu locations should already be set.
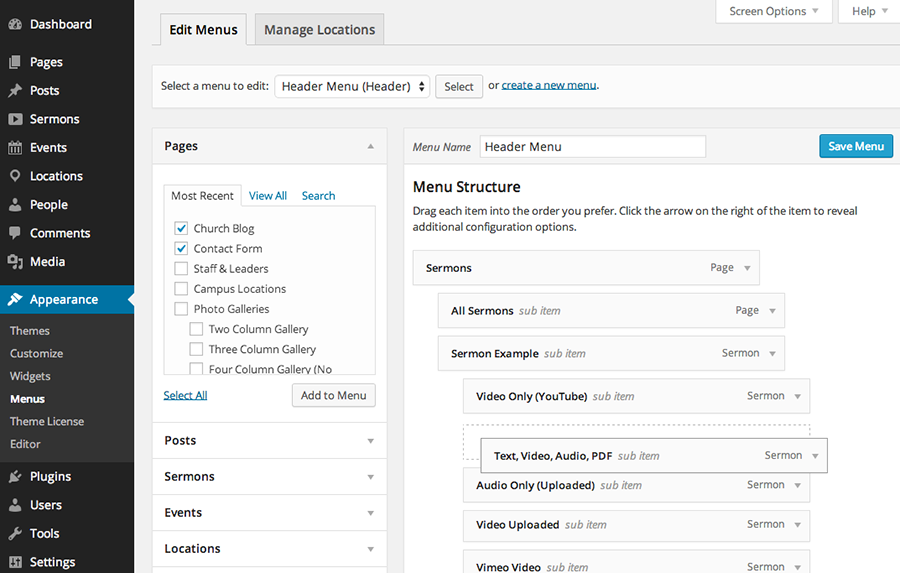
- Go to Appearance > Menus then select a menu to edit.
- The left-hand side shows the links that are available.
- Go to Screen Options at the top-right to reveal more options for links.
- Choose the link(s) you want to add to the menu then click Add to Menu.
- Once you have links in a menu, you can drag them around to change their order. You can also drag one link under another to created nested menu items (dropdown menus).
- Be sure to click Save Menu when you’re done editing.
Non-clickable Links
 We recommend making all links clickable since the user will usually expect a page to load when clicking a menu item. However, you still may want to create a top-level menu item that does nothing upon clicking but still shows dropdown links when hovering.
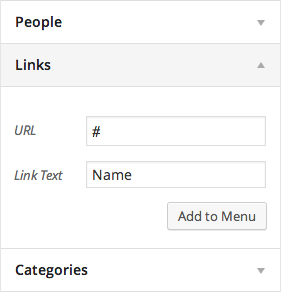
- Click Custom Links on the left-hand side.
- Enter # for the URL and set the link text.
- Click Add to Menu.
Descriptions Under Links
Your theme may allow for a short description beneath links. If so, here’s how.
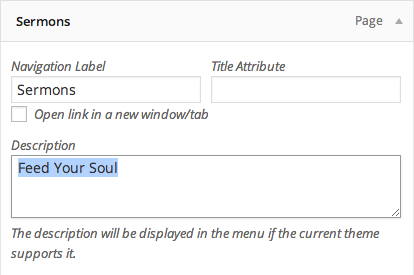
- Click Screen Options at the top-right.
- Make sure the Description option is checked.
- Edit a link and you will now see the Description field.
On the left-hand side of the menu screen is a list of pages. You can choose one and add it as a link to the menu. In the same way, you can link to blog categories, sermon topics, people groups, etc. To enable this functionality, go to Screen Options at the top-right and choose the options desired.
Open in New Window/Tab
Go to Appearance > Menus and click Screen Options at the top right. Check the box for Link Target. Now when you go to edit a link, there is an option for Open link in a new window/tab.
Link to Any URL
Go to Appearance > Menus and look for the Links option on the left-hand side. You can use it to add a link that goes to any URL on your website or another website. If Links is not showing, click on Screen Options at the top-right to make it visible.
You can create a menu and show it in a widget area. Here are instructions for creating a widget menu.
- Go to Appearance > Menus then add a new menu, add items to it and save.
- Go to Appearance > Widgets and drag the Navigation Menu widget into a widget area.
- Configure the widget in that area to show the menu you created.
Common Questions
- How can I show text under the menu items like in the demo?
- How can I make a menu link do nothing when clicked?
- How can I link to any page on any site from my menu?
- Why can’t I add a certain link to the menu?
More Information
- Appearance Menus Screen on the WordPress Codex