You can publish single or multiple-day events. They can recur weekly, monthly or yearly (with optional end date). Maps and directions can also be included. Events can be shown in a monthly calendar or in list format.
Contents
Events Pages
Main Events Page
First you need to create a page that shows the events.
- Go to Pages > Add New.
- Enter a title such as “Events” and any content that you want to appear at the top.
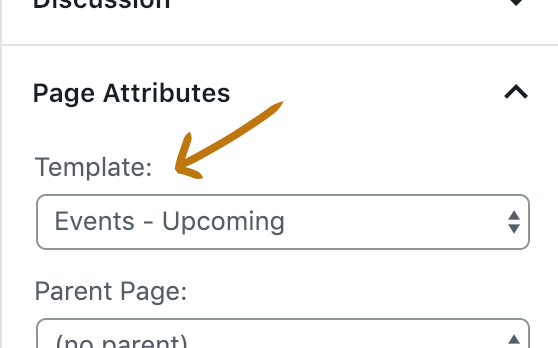
- Click Document, then…
- Under Template, choose “Events – Calendar” (monthly calendar) or “Events – Upcoming” (list format).
- Optionally set a Featured Image (see Section Banners for related information).
- Click Publish.
How to add your main events page
Optional Events Pages
 You can choose to make additional pages that show events in different ways. These page templates are available to you.
- Events – Calendar shows a monthly calendar
- Events – Upcoming lists upcoming events soonest first
- Events – Past lists past events in a similar manner
Monthly Calendar Tips
Here are tips for using the “Events – Calendar” template.
- You can go to Settings > General to make Week Starts On Sunday instead of Monday (the WordPress default).
- If your theme has a sidebar, it is recommended to hide it to allow the calendar more space. See the Options box when editing your page to hide the sidebar.
See Page Templates for more information.
Event Categories
Optionally organize events into categories such as children, classes, etc. You can then use a widget in the Events Sidebar to list the categories or link to them from your menu. Some of our themes do not have a sidebar. Instead, they automatically list event categories in the header.
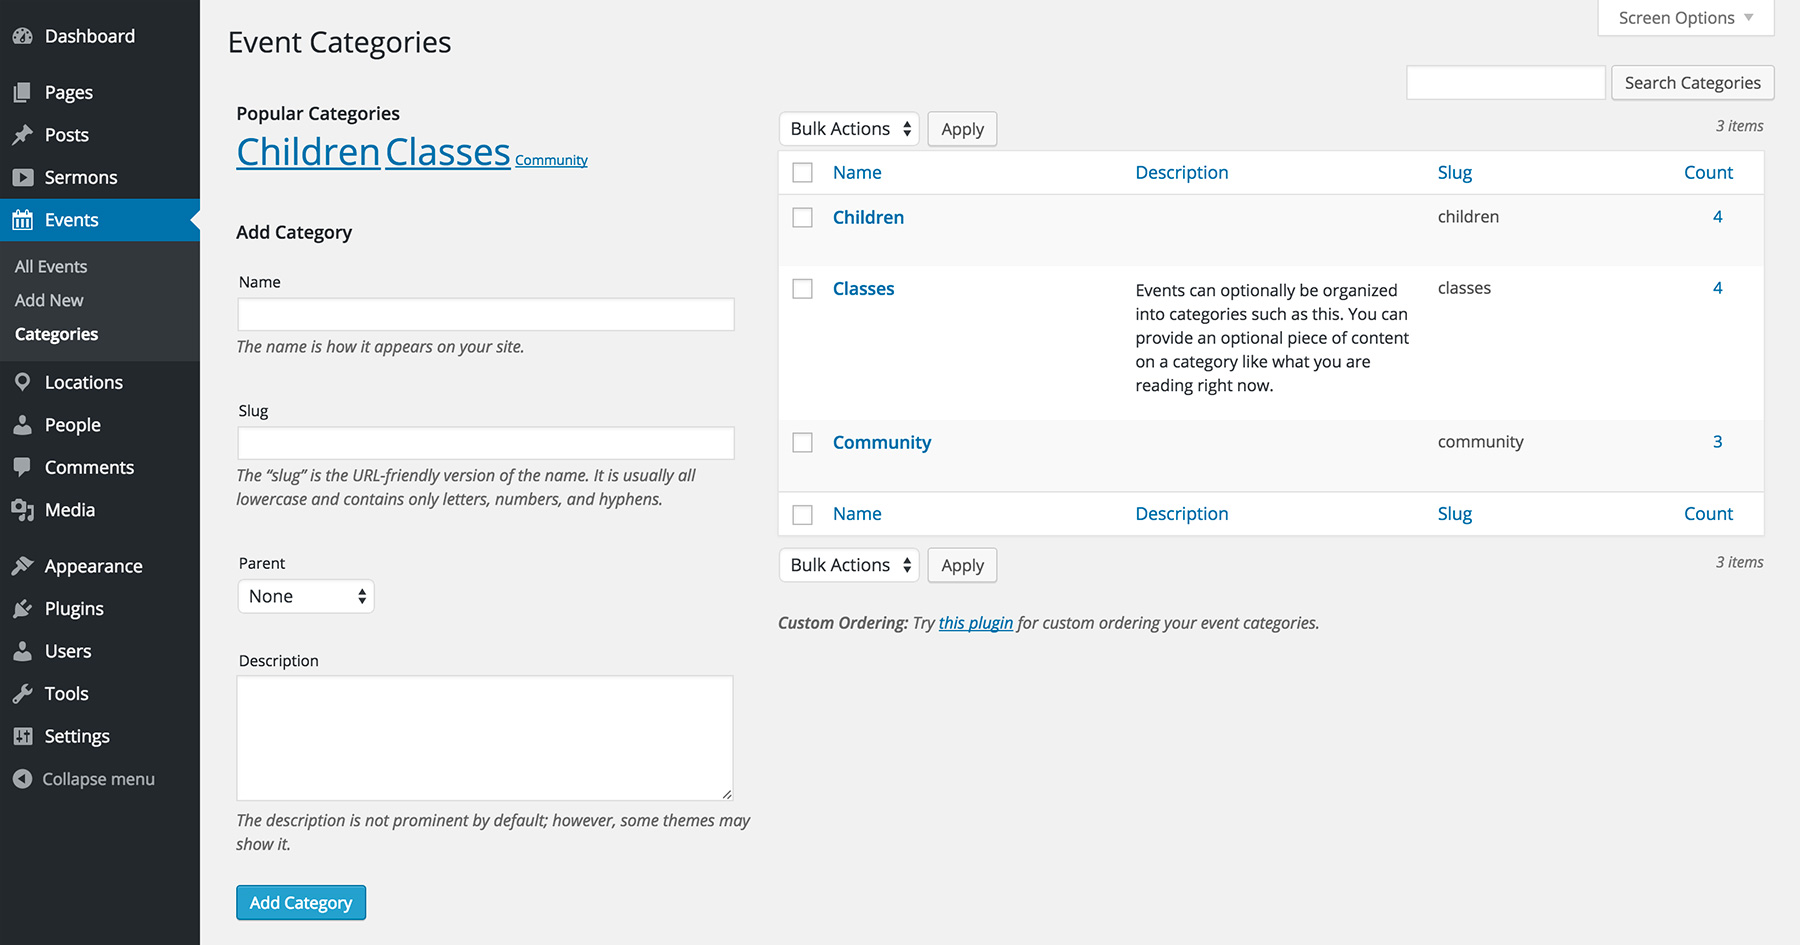
- Go to Events > Categories.
- Complete the form to add a category.
- View, edit and delete them on the right.
Managing Events
Adding an Event
- Go to Events > Add New.
- Enter a title for the event.
- Use the content editor to write information about the event.
- Fill in the details under Date & Time (Start Date is required).
- Fill in the optional details under Location (venue, address, map).
Note: You must set your Google Maps API Key in order for maps to work. - Optionally enter details for Registration (see Event Registration below).
- Click Document, then…
- Optionally add or choose Categories that this event belongs to.
- Optionally set a Featured Image to represent the event.
- Write a short Excerpt summarizing the event.
- Click Publish.
How to add an event
Editing and Deleting Events
- Go to Events > All Events.
- Hover over an event to see the Edit and Trash options.
Recurring Events
Save time by setting certain events to recur automatically each week, month or year when using the Pro add-on. When an event ends, its dates are automatically moved forward for you. This way you don’t have to update the dates over and over. Here are some example scenarios to give you an idea of what’s possible.
- Worship Services every Sunday at 9:30 and 11:00 am.
- New Members Class every month on last Saturday.
- Quarterly Meeting every three months on first Sunday.
- Bible Study every Wednesday and Sunday except Christmas.
- Children’s Night every Wednesday until June 10 (summer break).
- Community Outreach every first and third Sunday of the month.
- Church Picnic – Every year in May on first Saturday.
You can use this feature by choosing an option in the Recurrence field. Additional options for recurrence will then appear.
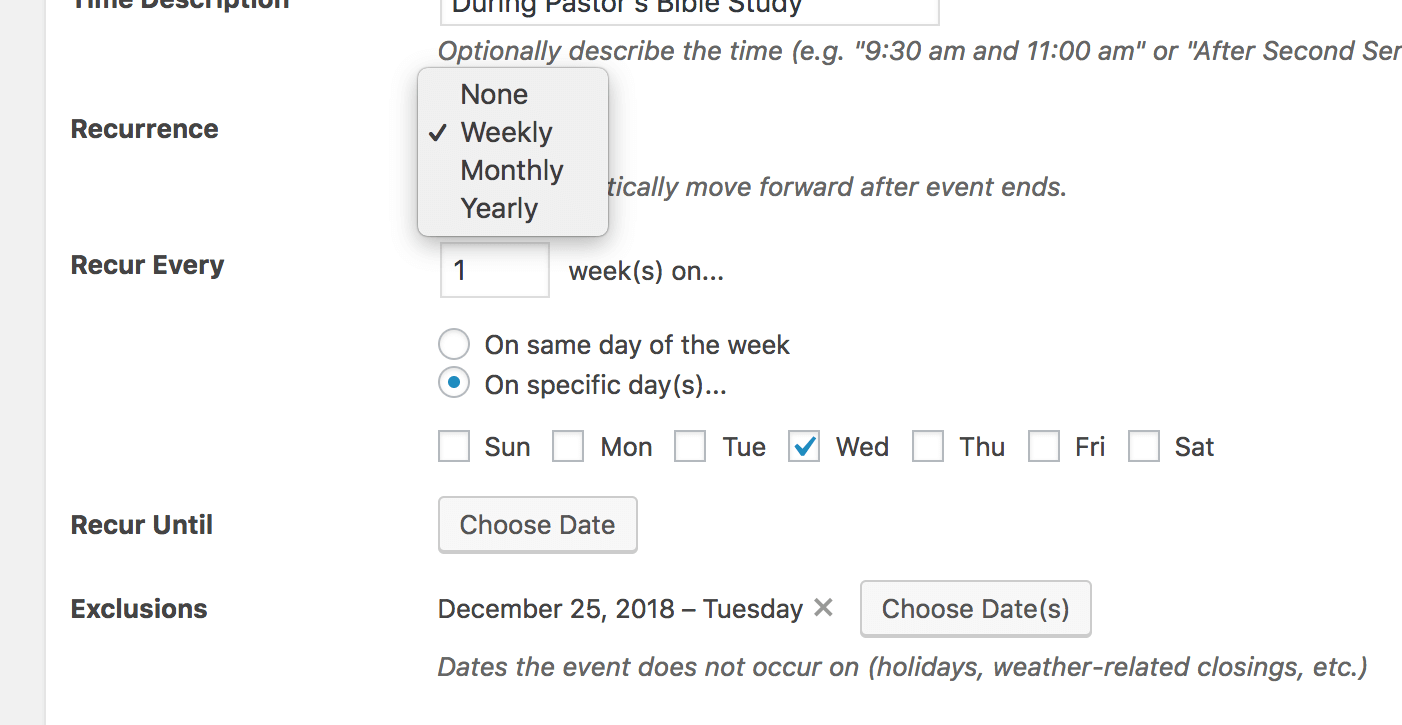
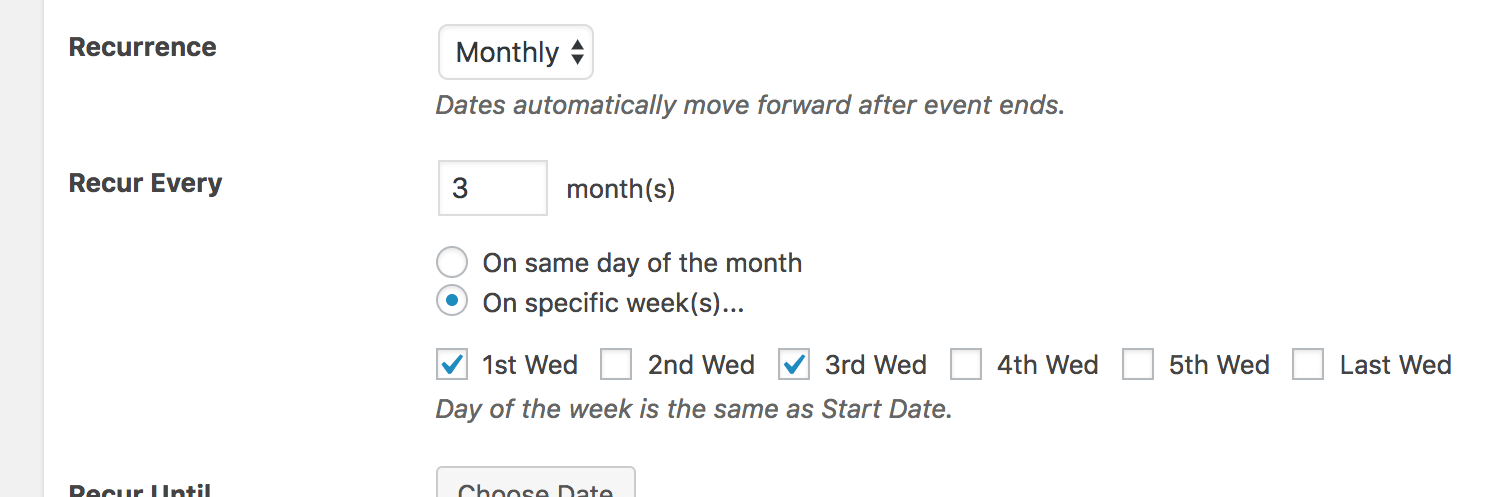
Above is an example using Weekly recurrence. Below are the options shown for Monthly recurrence. For a monthly event, the day of the week will be the same day of the week that the event’s Start Date uses.
Are your events not recurring? See the Troubleshooting section below.
Note: Basic recurrence without the Pro add-on is available on sites created October 2, 2018 or earlier. Pro provides the complete set of options and is required for any type of recurrence for sites created after this date.
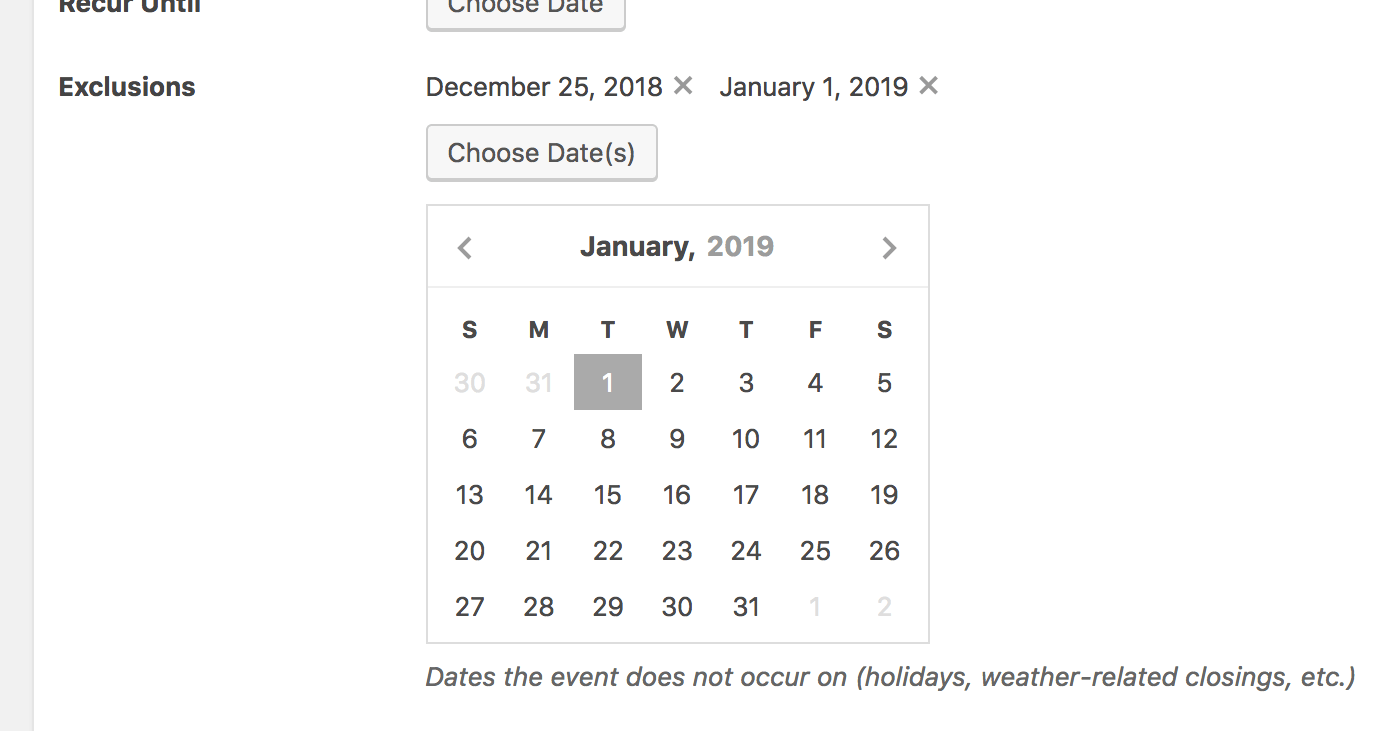
Excluded Dates
An Exclusions option appears when using the Pro add-on. This can be very useful in certain situations. It works with both recurring events and multi-day events. An event having an excluded date will not show on the calendar for that day. When viewing the event the excluded date(s) will be noted. Here are some example scenarios.
- Events that should not occur on holidays
- Weather-related closings
- Other irregular schedules
You can choose one or multiple dates to exclude for an event. Christmas and New Year’s day are excluded in this example.
Event Widgets
Go to Appearance > Customize > Widgets to add event-related widgets to different widget areas on your website. The CT Events widget is especially relevant. It can show upcoming or past events. It’s also useful for showing upcoming events on the homepage.
Read the Widgets guide for more information.
Event Registration
There are several solutions you can use for event registration.
- A basic solution is to use a form plugin like Contact Form 7, Ninja Forms or WPForms to embed a registration form into your event’s content (using a shortcode). These are free and will email you each registration (form submission). Ninja Forms and WPForms can also store submissions in your WordPress admin area and you can buy an add-on to accept payments.
- Tickera is a WordPress plugin made specifically for selling event tickets.
- If you are using a church management system (ChMS), it may have an event registration feature that you can link out to. You can use the Registration URL field for this and it will cause a Registration button to show.
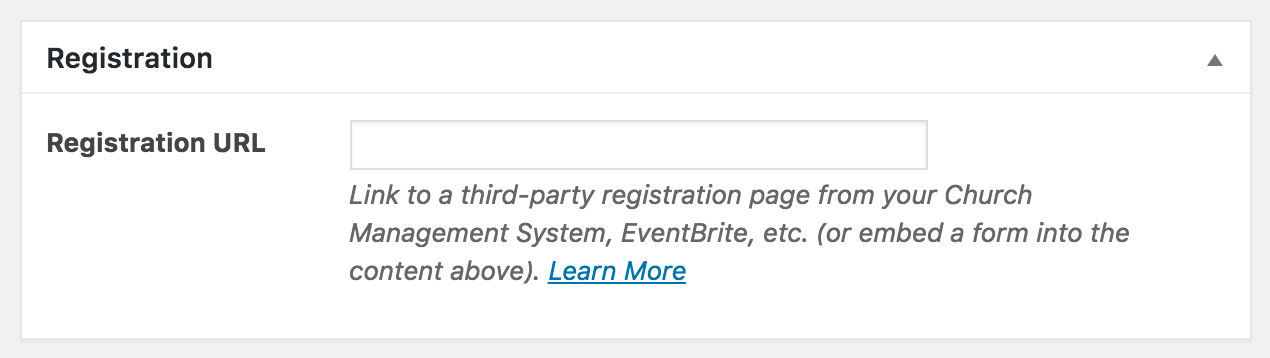
- If you need something more sophisticated (e.g. selling tickets), consider linking out to a service like EventBrite (free for free events), Bizzabo or Yapsody. TypeForm is another possibility. You can use the Registration URL field for this also (see screenshot above).
Please let us know what works best for you so we can refine these tips for other churches.
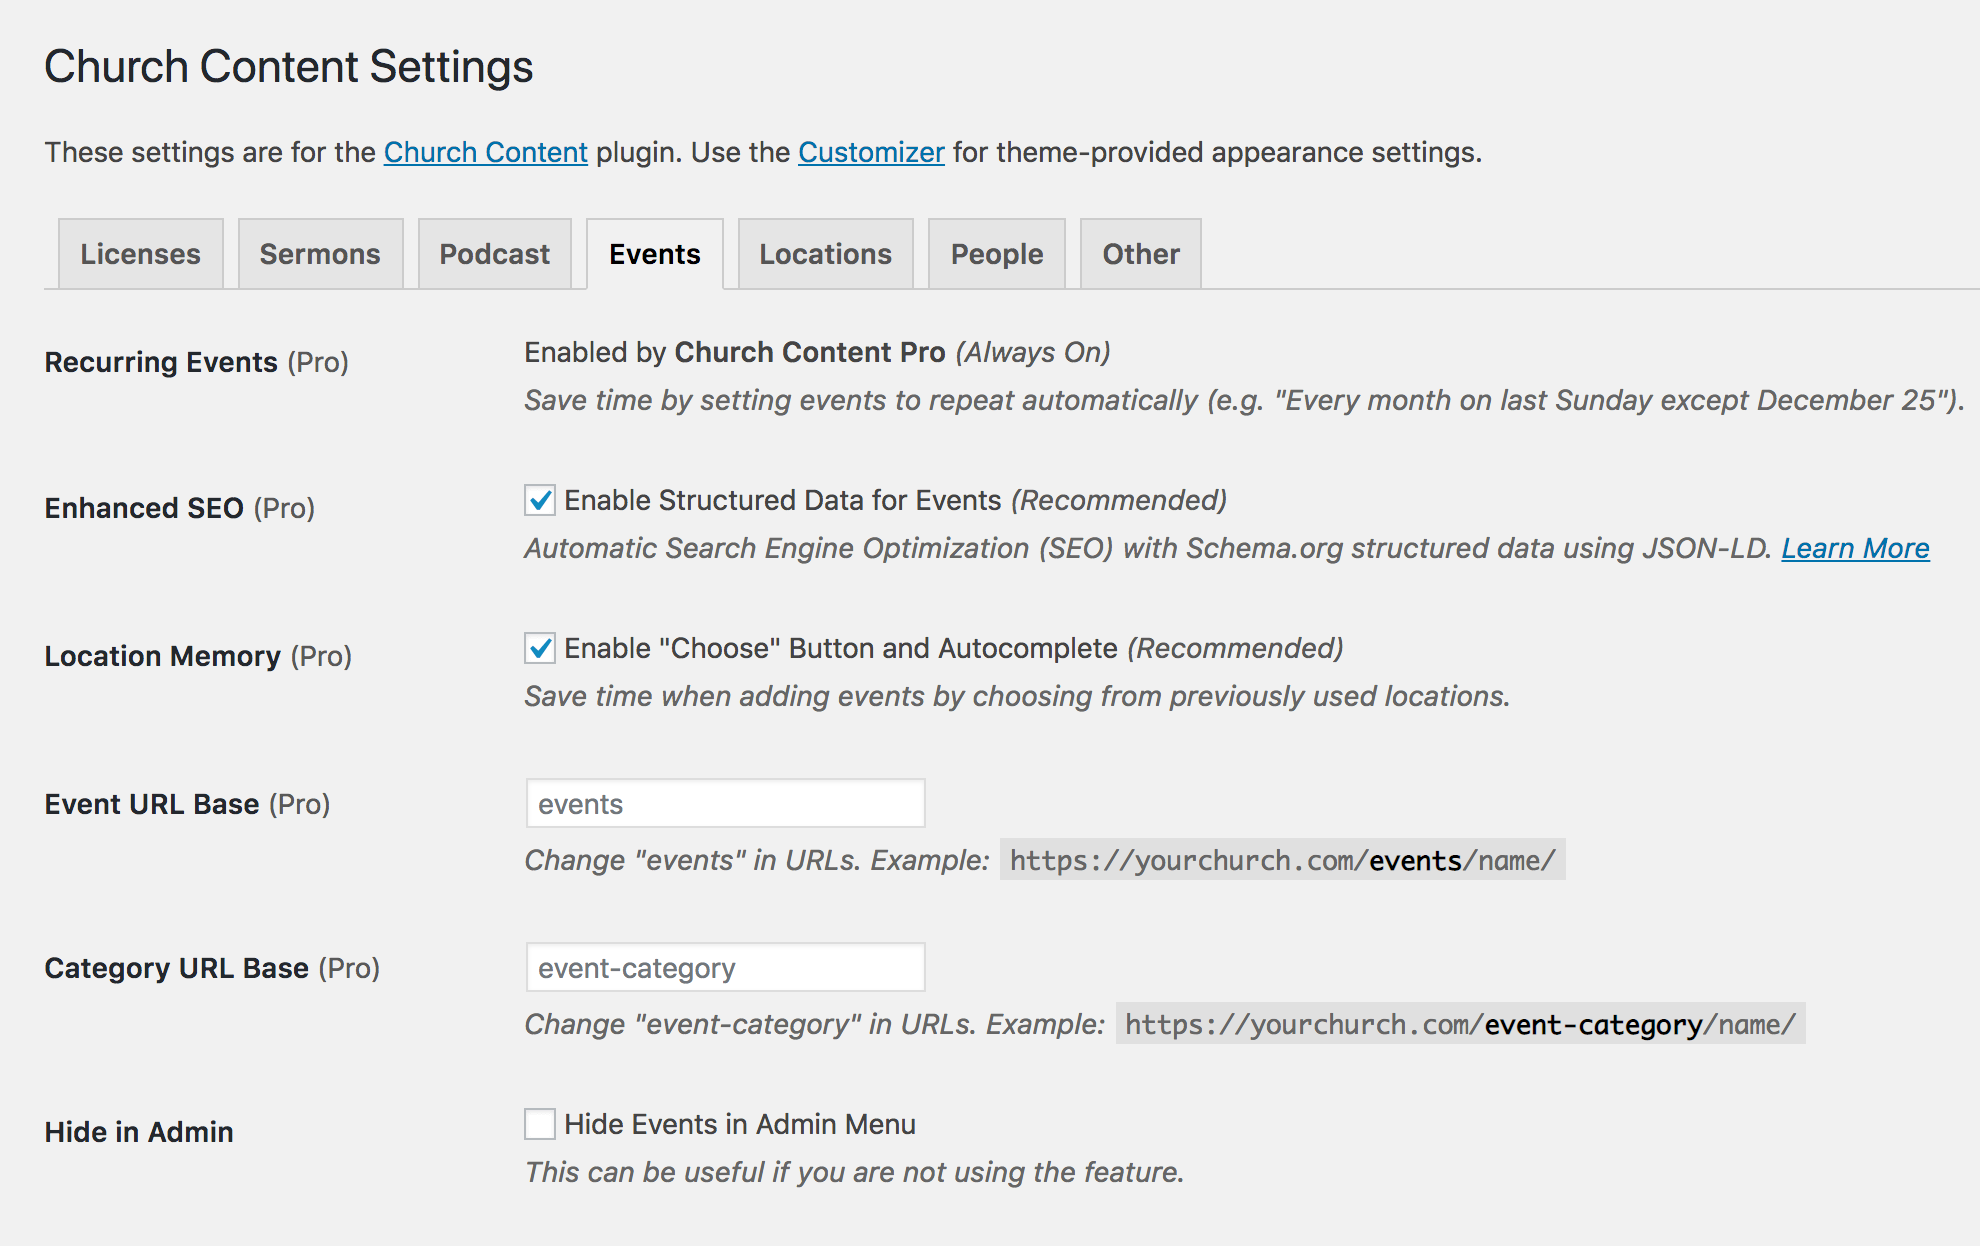
Settings for Events
Settings for events are available in Settings > Church Content > Events.
Event Troubleshooting
There are some things you can check if your events are not working as expected.
Event Not Showing
- Make sure the event has a Start Date or End Date that is today or future in order for it to show on Upcoming Events.
- If your events page is not showing events, make sure it is using the Events – Upcoming (or Events – Past) template.
- If events are not showing in the CT Events widget, make sure the widget is set to show Upcoming or Past accordingly.
Event Not Recurring
- Check your event to be sure that it is set to recur as expected.
- Go to Tools > Site Health. Are loopback connections failing? If so, try deactivating all plugins except Church Content to see if the issue is plugin-caused. Otherwise, ask your web host to fix loopback connections. WordPress uses this for scheduled tasks (which we reply on for recurring events).
- Are you using a caching plugin? If so, be aware that caching plugins can interfere with WordPress’s ability to run scheduled tasks, such as moving an event’s date forward, publishing scheduled posts, etc. You should setup a cron job manually to ensure various WordPress maintenance is completed.
- There are other reasons WordPress may not be firing scheduled tasks. Install Debug Bar and Debug Bar Cron then click “Debug” at the top of your admin area. If the “Cron” section shows all dates in the past then WordPress’s simulated cron is not executing as expected and you should setup a cron job manually.
Common Questions
- How can I organize events into categories?
- How can I show events in a monthly calendar?
- How can I make an event recur in a custom manner?
- Can I exclude events on specific dates?
- Why are recurring event dates not changing automatically?
- Why don’t the extra options for recurring events show?
- Why are my recurring events not showing correctly?
- Why isn’t my event showing?
- How can I make the calendar start the week on Sunday?
- Why can’t I create a page at domain.com/events?
- Can visitors register for events?
- Why are same-day events showing in the wrong order?
- Why is my recurring event showing on the calendar every day?
- Can I make an event recur on the fifth week of a month?
- How can I duplicate an event?
- How can we show a notice for a canceled event?